P-40 Warhawk Forums
March 19, 2024, 05:45:42 PM *
Welcome, Guest. Please login or register.

Login with username, password and session length
News: SMF - Just Installed!
 
   Home   Help Search Login Register  
Pages: 1 [2] 3 4 ... 8
  Print  
Author Topic: 1:48 Mauve P-40N "Lope's Hope"  (Read 56160 times)
Vince_M
Sr. Member
****
Posts: 318


View Profile
« Reply #15 on: December 29, 2017, 12:14:18 AM »

Well, too busy lately so work on this project has stalled for a while.
However, I will finish it.
Here is a shot of the finished propeller.  I has been sprayed with a mixture of Future and Tamiya Flat Base.
I used too much flat base so it is a little "chalky" but it looks nice and weathered that way, eh?


Logged
P-40 Admin
Administrator
Sr. Member
*****
Posts: 289


View Profile Email
« Reply #16 on: December 30, 2017, 04:56:26 PM »

Looks good that way
Logged
Vince_M
Sr. Member
****
Posts: 318


View Profile
« Reply #17 on: December 31, 2017, 12:34:38 AM »

Thanks!
I just "eyeballed" the blade pitch angle...and it is a little too flat.
I think minimum was 22 degrees and I won't miss it on the next kit I build!
Logged
Mark Joyce
Sr. Member
****
Posts: 408


View Profile
« Reply #18 on: December 31, 2017, 11:19:32 PM »

I don't know about the angle, Vince, but everything about the prop and spinner look good to me!
Logged

Ignorance is bliss
Vince_M
Sr. Member
****
Posts: 318


View Profile
« Reply #19 on: January 02, 2018, 07:13:29 AM »

Here I have used my drill press to create holes for the nice brass gun barrels from Master:


Perhaps more important that the holes were the backstops that need to be there or else you lose your parts later at installation!


Logged
Jim
Newbie
*
Posts: 34


View Profile Email
« Reply #20 on: January 08, 2018, 08:05:09 AM »

Nice work Sir, keep up the outstanding work, great choice of plane too.
Logged
Vince_M
Sr. Member
****
Posts: 318


View Profile
« Reply #21 on: July 18, 2018, 01:14:43 PM »

Long time, no see!


Well my wife was on my butt to get the basement finished and boy was that a long drawn out process.

I will say it's nice to have a better basement and a nicer area to work.  Someday I will sheetrock the hobby room but the rest of the basement is done!


P-40N:

This kit was supposed to help restore my mojo and by that I mean to just relax and no more AMS to bog me down.

Well...the Mauve kit is really beautiful.  It has nice panel lines and good accurate shapes, but...

They compromised in a few key areas that I cannot ignore.  So, I think from now on it will be exclusively Hasegawa for P-40s.

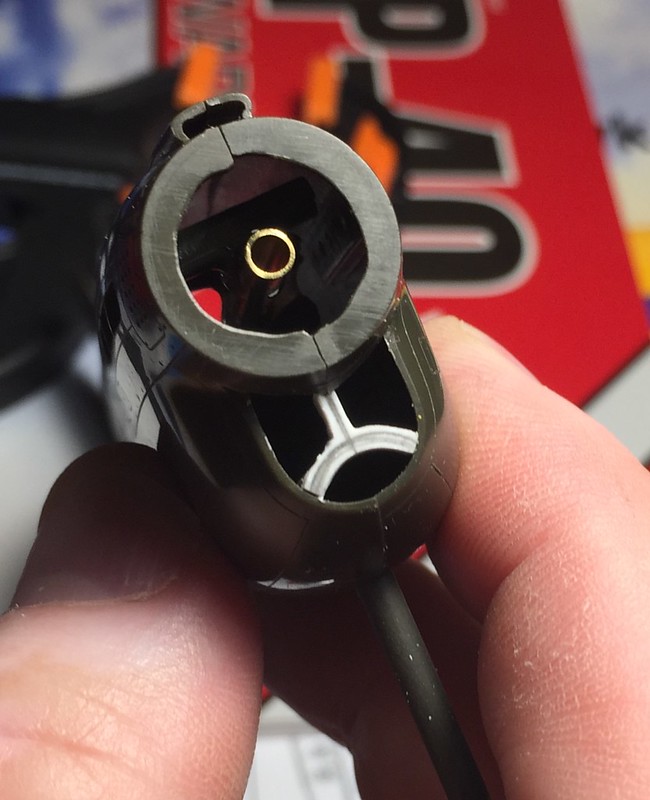
One area to address is the intake grill which is pretty frickin' prominent on a P-40.  It HAS to look right.


The pieces in the kit are awful and have almost no alignment capability.  It can drive you crazy just dry fitting.


So I had to come up with my own way to achieve solid, repeatable alignment:


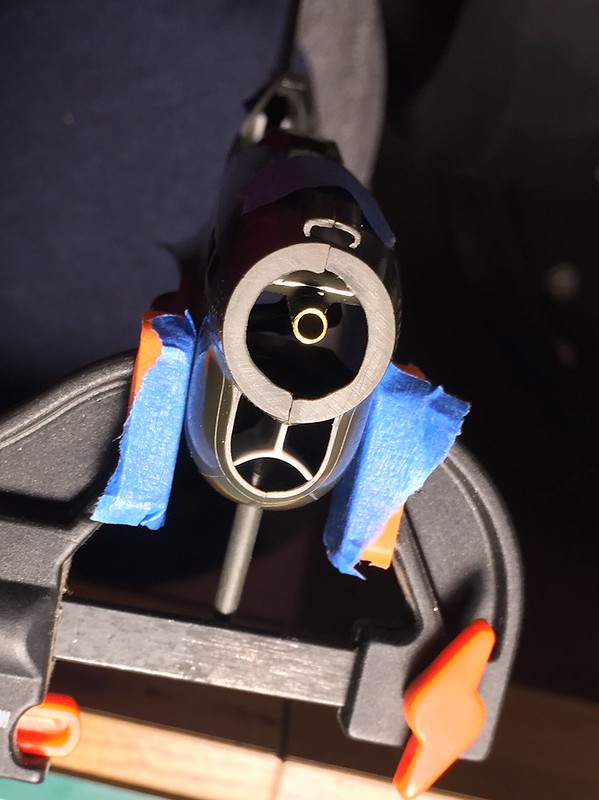
The leading edge shape needed good ol' styrene, files, and patience to reshape:


Here it is completed and with a coat of Mr. Surfacer White out of the spray can.  Wonderful stuff!


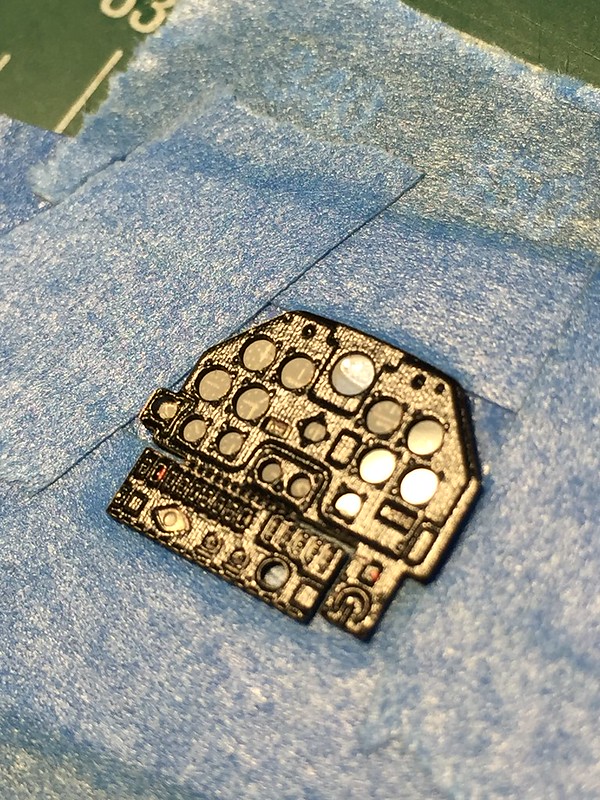
I also worked on the instrument panel which is from the Eduard photoetch set made for the "Eduard" kit (they did a Profipack version of the Mauve kit).

Here you see it with a piece of clear acetate epoxied onto the instrument faces.


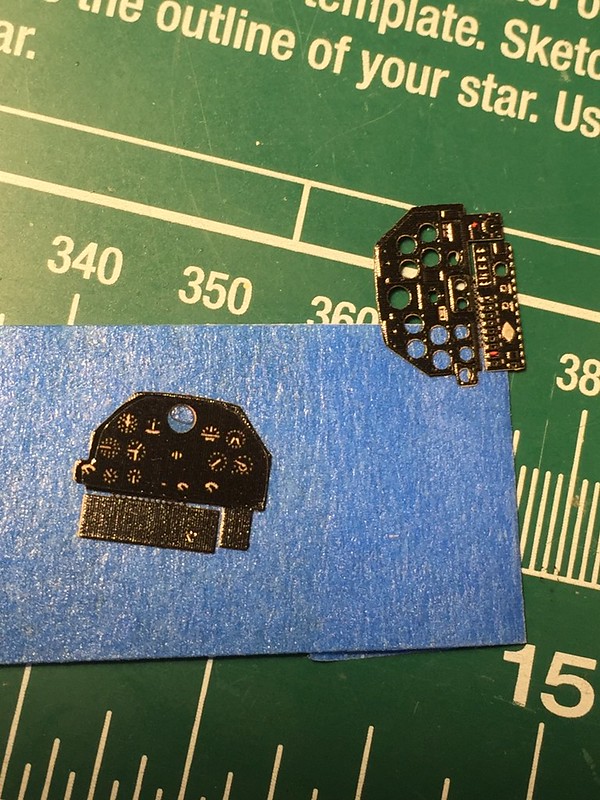
And here assembled with a little Micro Crystal Clear around the edge of the "sandwich" of parts:


One more photo.

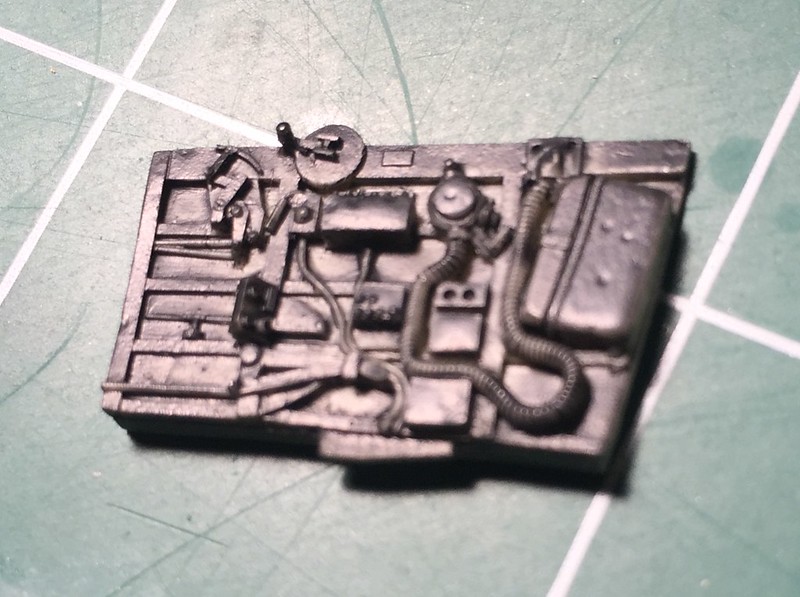
This is a resin part from the True Details cockpit set.  It is a marvelous fit and worth every penny.

Not much going on here but I experimented with cheap craft store acrylic satin black paint, as a primer.

I wanted to see if I could airbrush it and it did fine (although it didn't cover well in one coat).

I must say it snuggled down and did not hide even one bit of surface detail!


Logged
Mark Joyce
Sr. Member
****
Posts: 408


View Profile
« Reply #22 on: July 20, 2018, 09:58:13 PM »

Looking good, Vince!  I know what you mean about the Mauve kit; generally nice but there are a few areas needing improvement.  I too have issues getting its intake aligned.  The AMtech/AMT kits are the same way.  That is one area that the Hasegawa shines, since its design makes alignment easy and sure.  Same can be said for Hasegawa's cockpit.  I'm about to start one of the Eduard boxings but the intake is one area I don't need to concern myself with.  I'm grafting on a resin nose to do a Merlin engine P-40F from the 79th FG.  I really wish Hasegawa would issue a Merlin engine offering but, alas, it's probably not to be.

I also know what you mean about getting sidetracked with real-life projects.  I'm finishing up painting the exterior of our house.  Since the highs have been in the upper 90s to low 100s where I live, I think I would prefer an inside job like your basement right about now!

Mark
Logged

Ignorance is bliss
Vince_M
Sr. Member
****
Posts: 318


View Profile
« Reply #23 on: October 17, 2018, 03:59:29 AM »

Hello my friends!


Work has been progressing, slowly but surely.

I must say that being at the bench is where I like to be, to relieve stress.


Another weakness in the Mauve kit is the wheel wells...they are pathetic.

So I have tried to add some structure but decided to simulate the canvas liners with metal tape that you can get at the hardware store:


Here's one reason this project drags on, I'm a rivet maker (not a counter).  LOL

Actually, I got the rivet tools from UMM and just could not help myself!

« Last Edit: October 17, 2018, 04:05:08 AM by Vince_M » Logged
P-40 Admin
Administrator
Sr. Member
*****
Posts: 289


View Profile Email
« Reply #24 on: October 18, 2018, 07:06:47 AM »

Wow, looking good!
Logged
Mark Joyce
Sr. Member
****
Posts: 408


View Profile
« Reply #25 on: October 27, 2018, 10:54:48 PM »

Nice work on the wheel wells, Vince.  I probably have some unused resin ones that came with one of the several Eduard boxings I built in the past, which I would have been more than happy to have given you had I known you were going to all this effort!
Logged

Ignorance is bliss
Vince_M
Sr. Member
****
Posts: 318


View Profile
« Reply #26 on: October 30, 2018, 08:27:03 PM »

Thanks, Mark.
Appreciate that!
Logged
Vince_M
Sr. Member
****
Posts: 318


View Profile
« Reply #27 on: November 12, 2018, 02:12:58 AM »

Logged
Mark Joyce
Sr. Member
****
Posts: 408


View Profile
« Reply #28 on: December 06, 2018, 12:09:34 PM »

Keep at it, Vince!  Are you going to add rivets to the whole airframe?  And I have no idea why Mauve didn't open up that lower area. Out of sight, out of mind perhaps...

Mark
Logged

Ignorance is bliss
Vince_M
Sr. Member
****
Posts: 318


View Profile
« Reply #29 on: December 17, 2018, 01:27:28 PM »

Yes, Mark I'm going to rivet the whole thing.  The fuselage is hard.  I'm trying to use a ruler and double stick tape but it is not easy.

Here are the cockpit sides and the seat.  They need a clear flat coat but are pretty much done.

Logged
Pages: 1 [2] 3 4 ... 8
  Print  
 
Jump to:  

Powered by MySQL Powered by PHP Powered by SMF 1.1.21 | SMF © 2015, Simple Machines Valid XHTML 1.0! Valid CSS!